Tuesday 26 November 2013

DIY Edible Christmas Tree decoration

Hello everyone,
Hope your all well? So todays festive blog post will be a tutorial on a very easy although adorable edible tree decoration! 
 
Very tranditional but im a traditional kind of gal! And like sticking to hanging gingerbread men off my tree, looks great and makes the room smell scrumptious! 

You will need:
Gingerbread dough (see my recipe link below)
Royal icing
Edible sprinkles
Edible decorations
Ribbon 

So firstly pop on over to my gingerbread recipe   http://beautybakesandcakes23.blogspot.co.uk/2013/09/gingerbread.html?m=1 and make this scrummy dough, roll out and cut your gingerbread man shapes and before you bake it complete the following steps!

Take a dowel or a knife (anything to pierce a hole into the top of his (or her) head) like so....
  
Were going to jazz our men up a little and  have them holding mini candy canes, whilst your candy cane is still in the wrapper gently press it into his arm, this will just make a slight indent so when he is cooked the candy cane will slot into place (DONT bake the candy cane at this stage we are just pressing a indent in his arm)

Bake in the oven for aprox 12-15 mins or until lightly golden, you may need to pierce the hole in his head again while they are warm! let them cool completely, take some ribbon and thread it through the hole and tie at the top, this is what we are going to use to hang him from the tree!

Next make some Royal icing, im using the packet type, make it into a thick consistency, place in a piping bag and pipe some in the indent on his arm
 
And then unwrap your mini candy cane and stick it down, leave to set for about an hour!

Next with the icing draw on some eyes and a mouth also add three dots down his tummy and stick whatever you like on him for buttons im using edible silver pearls, you can use jelly sweets, chocolate buttons anything really! 

Next add a little water to your Royal icing so its not as thick and more of a spreadable consistency, spread some on his feet and add some sprinkles im using Christmas spinkles, again you can use jelly sweets, coloured sugar see my DIY sprinkles recipe for this http://beautybakesandcakes23.blogspot.co.uk/2013/10/diy-edible-sprinkles.html?m=1 

Leave to set and tardar!

Hope you all enjoyed this, have you tried this? Any recommendations? Stay tuned for a lot more festive posts! 

Why not try this using a Christmas tree cutter, a round cutter to make baubles, i'll be doing another DIY tree decoration post with more ideas coming soon:)

Happy baking
Xxx  

Saturday 23 November 2013

Christmas cupcake decoration ideas

Hello everyone,
So today im going to share with you three easy but festive ways to decorate your Christmas cupcakes this year!

Firstly: Winter Wonderland

You will need:
Blue coloured frosting / buttercream
White fondant
Snowflake cutter or you can cut a snowflake by hand
Silver edible pearls or silver balls of fondant
Piping bag with a star tip
And a cupcake (see my vanilla sponge cake recipe here http://beautybakesandcakes23.blogspot.co.uk/2013/07/vanilla-cupcakes.html?m=1 )

So firstly fill your piping bag with you blue frosting and pipe a swirl from the outer edge of the cupcake round and inwards to the middle.

Secondly roll out your white fondant and cut out three snowflakes, im using a snowflake kemper cutter you can find these on ebay and are very inexpensive.

Stick your snowflakes onto the cupcake, pressing down gently.

And finally take a few edible silver pearls and stick them onto the cake. 

Next cupcake: Candy cane

You will need:
White frosting / buttercream
Piping bag and a star tip
Mini candy canes
Cupcake ( see link above for a great recipe for vanilla sponge cake)
Silver edible pearls or silver balls of fondant

Firstly fill you piping bag with your frosting and from the outer edge of the cupcake swirl frosting around and into the centre of the cupcake.

And last but not least stick on the candy canes and silver edible pearls! Easy right!?

And the last cupcake im going to show you is: A Holly leaf cupcake

You will need:
Christmas coloured sprinkles
Green fondant
Red fondant
Holly leaf cutter
White frosting / buttercream
Piping bag and star tip
And a cupcake again see link above for my recipe.

Firstly as before pipe the frosting from outwards in onto the cupcake.

Secondly roll out your green fondant and using your cutter or you can cut these by hand, cut out your Holly leaf and place it into the centre of your cupcake, again you can buy these cutters on ebay.

Roll a small ball of red fondant and stick that with a tiny bit of water into the centre of the Holly leaf.

Finally sprinkle over some christmas sprinkles.

Hope you guys enjoyed this guide on how to create simple and easy decorations for your Christmas cupcakes, please follow for more festive blog posts! Have your tried these? Any requests? 

Happy baking
Xxx

Wednesday 13 November 2013

Cinnamon rolls


Hey guys, hope your well? So today im going to share an amazing recipe for cinnamon rolls, perfect for this time of year:)

So you will need:
4 cups of self raising flour
1/4 cup granulated sugar
2.5 tsp dry active yeast
3/4 cup milk 
1/4 cup of warm water
1 egg
1/4 cup of melted butter plus extra for brushing over the rolls

For the filling:
1 tbsp softened butter
3/4 cup of dark brown soft sugar
1/2 cup of granulated sugar
2 tsp ground cinnamon
1/2 cup of mixed dried fruit (optional) 

For the glaze:
1 tbsp softened butter
1/2 cup of milk
2 cups (aprox) icing sugar

Firstly place your water, yeast and a pinch of the granulated sugar into a bowl and leave to sit for 5-7 minutes or until frothy. 

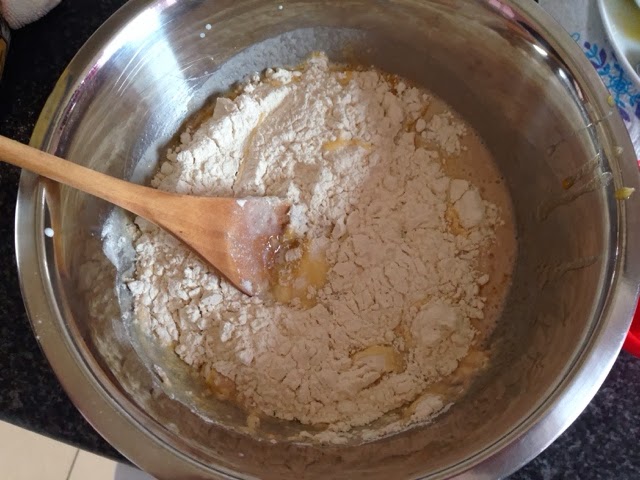
Next into a larger bowl add your egg, granulated sugar, milk and melted butter, combine together and then add your yeast and water mixture and then gradually add your flour until a soft dough is formed, you may not need all of the flour.  


Now knead your dough with the palm of your hands on a lightly floured surface until it becomes smoth and elastic about 7 minutes.
  
Lightly grease a bowl, place in your dough, cover with cling film or a tea towel and leave to rise in a warm place until doubled in size about an hour or two.

Once your dough has risen, punch the air out and roll onto a lightly floured surface into a rectangle shape.

Spread the butter over the top. Combine the brown sugar, granulated sugar and cinnamon.

Sprinkle the top with the sugar and cinnamon mixture evenly and sprinkle on your dried fruit.
Starting from one end of the dough tightly roll the dough up.

Cut the dough into 14-16 even slices, places the rolls face down onto a greased baking tray, cover and leave to rise again for about an hour.

Brush the rolls with the extra melted butter and place in a pre heated oven at gas mark 4 for aprox 25-30mins or until golden.

As soon as they come out of the oven combine all the glaze Ingrediants together, you may need more or less icing sugar your looking for a runny consistency, if too thick add more milk.

Pour over the hot cinnamon rolls and dig in. :)
  
Hope you guys enjoyed this recipe, let me know if you try it or have any requests, stay tuned for more festive treats in my Christmas series.

Happy baking
Xxx  


Sunday 3 November 2013

Traditional non alcoholic christmas cake

Hey everyone, hope your all well? So today im going to share with you my recipe for traditional non alcoholic christmas cake, im making mine into cupcakes but i use the same recipe for my 8 inch round christmas cake which i will be doing later in the year and i will be sure to show you ways to decorate it but for today were going to make them into cupcakes so lets get started!

So to fill your house with the best smell ever you will need:
8oz plain flour
8oz butter
8oz dark brown soft sugar
4 eggs
24oz mixed dried fruit (i use a mix between raisins, currents and sultanas) 
2oz mixed candied peel
2oz glace cherries halved 
1tsp mixed spice or your favourite spices
1/2tsp cinnamon
1tbsp cocoa powder
Rind of 1 lemon
Rind of 1 orange
Pinch of salt
3tbsp apricot jam

So lets begin, start by preheating your oven to gas mark 2 and then mix together your butter and sugar until light and fluffy and add in the eggs 1 at a time and mix well inbetween each addition

Its ok if your mix curdles a bit, stir in your lemon and orange rind

Sift together your flour, salt, cocoa powder and spices, take 2tbsp of this and add it to your dry fruit mixing it in well until all the fruit is coated, add your fruit and the rest of your flour into your butter, sugar and eggs and mix well

Next line a muffin tin with liners and spoon the mixture evenly into the cases, fill the cupcake cases 3/4 full and bake in the oven for 30-35 mins or until a skewer insterted into the centre comes out clean

Finally heat the apricot jam on a stove or in the microwave and run it through a sieve 
 
Once the cakes are cooked take them out of the oven and straight away brush the jam over the top of them

Leave the cakes to cool completely!

Lets talk decoration......these are perfect by themselves or if your not the decorating type you can just add marzipan and ready to roll icing and their good to go, but i personally love to decorate, i have many ways i like to decorate mine, stay tuned for christmas cupcake decoration ideas but for today im going to show you how to make a snowman! Please excuse the side full of icing sugar i had a lot to make that day.


You will need:
100g Golden marzipan
200g ready to roll icing in the colours white, blue, orange and black
Edible glue (mix suagr and water to make this)
Pink food colouring
 
First roll out your marzipan to about 1/4 inch thick and using a circle cutter the same size as your cupcakes cut out circles and place them onto your cupcake and smooth out
 
Do the same with your ready to roll icing and stick it on top of the marzipan with your sugar and water mix and smooth out

Next roll out your blue icing and cut into a half moon shape

Stick it onto the top of your cupcake again just use a little sugar and water to stick it down

Roll out a thin strip of blue icing for the hat band stick it on and use a cocktail stick to give it texture, roll a small ball of blue icing use a cocktail stick again on this to give it texure and stick that on the top of the hat

Next use a ball tool or a small round object to press small holes into the icing for eyes, add a little of the water and sugar mixture and place two small balls of black icing for eyes, using the orange icing shape a cone shape for the carrot nose again stick on with the water and sugar

Next take the pink food colouring and dip a tiny bit on his face for rosey cheeks, use the end of a nozzle, straw or just use a knife to make an imprint of his mouth and there we go a lovely little frosty snowman, perfect for the holiday season! Here are some more ideas for your cupcakes if you would like a blog post on how to do any of these please let me know, there will be a lot more tutorials on how to decorate christmas cupcakes so please stay tuned for that! 


Stay tuned for may more feative posts and please follow and let me know if you have any requests, thank you!
Xxx


Tuesday 26 November 2013

DIY Edible Christmas Tree decoration

Posted by BeautyBakesandCakes at 02:55 0 comments
Hello everyone,
Hope your all well? So todays festive blog post will be a tutorial on a very easy although adorable edible tree decoration! 
 
Very tranditional but im a traditional kind of gal! And like sticking to hanging gingerbread men off my tree, looks great and makes the room smell scrumptious! 

You will need:
Gingerbread dough (see my recipe link below)
Royal icing
Edible sprinkles
Edible decorations
Ribbon 

So firstly pop on over to my gingerbread recipe   http://beautybakesandcakes23.blogspot.co.uk/2013/09/gingerbread.html?m=1 and make this scrummy dough, roll out and cut your gingerbread man shapes and before you bake it complete the following steps!

Take a dowel or a knife (anything to pierce a hole into the top of his (or her) head) like so....
  
Were going to jazz our men up a little and  have them holding mini candy canes, whilst your candy cane is still in the wrapper gently press it into his arm, this will just make a slight indent so when he is cooked the candy cane will slot into place (DONT bake the candy cane at this stage we are just pressing a indent in his arm)

Bake in the oven for aprox 12-15 mins or until lightly golden, you may need to pierce the hole in his head again while they are warm! let them cool completely, take some ribbon and thread it through the hole and tie at the top, this is what we are going to use to hang him from the tree!

Next make some Royal icing, im using the packet type, make it into a thick consistency, place in a piping bag and pipe some in the indent on his arm
 
And then unwrap your mini candy cane and stick it down, leave to set for about an hour!

Next with the icing draw on some eyes and a mouth also add three dots down his tummy and stick whatever you like on him for buttons im using edible silver pearls, you can use jelly sweets, chocolate buttons anything really! 

Next add a little water to your Royal icing so its not as thick and more of a spreadable consistency, spread some on his feet and add some sprinkles im using Christmas spinkles, again you can use jelly sweets, coloured sugar see my DIY sprinkles recipe for this http://beautybakesandcakes23.blogspot.co.uk/2013/10/diy-edible-sprinkles.html?m=1 

Leave to set and tardar!

Hope you all enjoyed this, have you tried this? Any recommendations? Stay tuned for a lot more festive posts! 

Why not try this using a Christmas tree cutter, a round cutter to make baubles, i'll be doing another DIY tree decoration post with more ideas coming soon:)

Happy baking
Xxx  

Saturday 23 November 2013

Christmas cupcake decoration ideas

Posted by BeautyBakesandCakes at 01:55 0 comments
Hello everyone,
So today im going to share with you three easy but festive ways to decorate your Christmas cupcakes this year!

Firstly: Winter Wonderland

You will need:
Blue coloured frosting / buttercream
White fondant
Snowflake cutter or you can cut a snowflake by hand
Silver edible pearls or silver balls of fondant
Piping bag with a star tip
And a cupcake (see my vanilla sponge cake recipe here http://beautybakesandcakes23.blogspot.co.uk/2013/07/vanilla-cupcakes.html?m=1 )

So firstly fill your piping bag with you blue frosting and pipe a swirl from the outer edge of the cupcake round and inwards to the middle.

Secondly roll out your white fondant and cut out three snowflakes, im using a snowflake kemper cutter you can find these on ebay and are very inexpensive.

Stick your snowflakes onto the cupcake, pressing down gently.

And finally take a few edible silver pearls and stick them onto the cake. 

Next cupcake: Candy cane

You will need:
White frosting / buttercream
Piping bag and a star tip
Mini candy canes
Cupcake ( see link above for a great recipe for vanilla sponge cake)
Silver edible pearls or silver balls of fondant

Firstly fill you piping bag with your frosting and from the outer edge of the cupcake swirl frosting around and into the centre of the cupcake.

And last but not least stick on the candy canes and silver edible pearls! Easy right!?

And the last cupcake im going to show you is: A Holly leaf cupcake

You will need:
Christmas coloured sprinkles
Green fondant
Red fondant
Holly leaf cutter
White frosting / buttercream
Piping bag and star tip
And a cupcake again see link above for my recipe.

Firstly as before pipe the frosting from outwards in onto the cupcake.

Secondly roll out your green fondant and using your cutter or you can cut these by hand, cut out your Holly leaf and place it into the centre of your cupcake, again you can buy these cutters on ebay.

Roll a small ball of red fondant and stick that with a tiny bit of water into the centre of the Holly leaf.

Finally sprinkle over some christmas sprinkles.

Hope you guys enjoyed this guide on how to create simple and easy decorations for your Christmas cupcakes, please follow for more festive blog posts! Have your tried these? Any requests? 

Happy baking
Xxx

Wednesday 13 November 2013

Cinnamon rolls

Posted by BeautyBakesandCakes at 01:25 0 comments

Hey guys, hope your well? So today im going to share an amazing recipe for cinnamon rolls, perfect for this time of year:)

So you will need:
4 cups of self raising flour
1/4 cup granulated sugar
2.5 tsp dry active yeast
3/4 cup milk 
1/4 cup of warm water
1 egg
1/4 cup of melted butter plus extra for brushing over the rolls

For the filling:
1 tbsp softened butter
3/4 cup of dark brown soft sugar
1/2 cup of granulated sugar
2 tsp ground cinnamon
1/2 cup of mixed dried fruit (optional) 

For the glaze:
1 tbsp softened butter
1/2 cup of milk
2 cups (aprox) icing sugar

Firstly place your water, yeast and a pinch of the granulated sugar into a bowl and leave to sit for 5-7 minutes or until frothy. 

Next into a larger bowl add your egg, granulated sugar, milk and melted butter, combine together and then add your yeast and water mixture and then gradually add your flour until a soft dough is formed, you may not need all of the flour.  


Now knead your dough with the palm of your hands on a lightly floured surface until it becomes smoth and elastic about 7 minutes.
  
Lightly grease a bowl, place in your dough, cover with cling film or a tea towel and leave to rise in a warm place until doubled in size about an hour or two.

Once your dough has risen, punch the air out and roll onto a lightly floured surface into a rectangle shape.

Spread the butter over the top. Combine the brown sugar, granulated sugar and cinnamon.

Sprinkle the top with the sugar and cinnamon mixture evenly and sprinkle on your dried fruit.
Starting from one end of the dough tightly roll the dough up.

Cut the dough into 14-16 even slices, places the rolls face down onto a greased baking tray, cover and leave to rise again for about an hour.

Brush the rolls with the extra melted butter and place in a pre heated oven at gas mark 4 for aprox 25-30mins or until golden.

As soon as they come out of the oven combine all the glaze Ingrediants together, you may need more or less icing sugar your looking for a runny consistency, if too thick add more milk.

Pour over the hot cinnamon rolls and dig in. :)
  
Hope you guys enjoyed this recipe, let me know if you try it or have any requests, stay tuned for more festive treats in my Christmas series.

Happy baking
Xxx  


Sunday 3 November 2013

Traditional non alcoholic christmas cake

Posted by BeautyBakesandCakes at 02:12 0 comments
Hey everyone, hope your all well? So today im going to share with you my recipe for traditional non alcoholic christmas cake, im making mine into cupcakes but i use the same recipe for my 8 inch round christmas cake which i will be doing later in the year and i will be sure to show you ways to decorate it but for today were going to make them into cupcakes so lets get started!

So to fill your house with the best smell ever you will need:
8oz plain flour
8oz butter
8oz dark brown soft sugar
4 eggs
24oz mixed dried fruit (i use a mix between raisins, currents and sultanas) 
2oz mixed candied peel
2oz glace cherries halved 
1tsp mixed spice or your favourite spices
1/2tsp cinnamon
1tbsp cocoa powder
Rind of 1 lemon
Rind of 1 orange
Pinch of salt
3tbsp apricot jam

So lets begin, start by preheating your oven to gas mark 2 and then mix together your butter and sugar until light and fluffy and add in the eggs 1 at a time and mix well inbetween each addition

Its ok if your mix curdles a bit, stir in your lemon and orange rind

Sift together your flour, salt, cocoa powder and spices, take 2tbsp of this and add it to your dry fruit mixing it in well until all the fruit is coated, add your fruit and the rest of your flour into your butter, sugar and eggs and mix well

Next line a muffin tin with liners and spoon the mixture evenly into the cases, fill the cupcake cases 3/4 full and bake in the oven for 30-35 mins or until a skewer insterted into the centre comes out clean

Finally heat the apricot jam on a stove or in the microwave and run it through a sieve 
 
Once the cakes are cooked take them out of the oven and straight away brush the jam over the top of them

Leave the cakes to cool completely!

Lets talk decoration......these are perfect by themselves or if your not the decorating type you can just add marzipan and ready to roll icing and their good to go, but i personally love to decorate, i have many ways i like to decorate mine, stay tuned for christmas cupcake decoration ideas but for today im going to show you how to make a snowman! Please excuse the side full of icing sugar i had a lot to make that day.


You will need:
100g Golden marzipan
200g ready to roll icing in the colours white, blue, orange and black
Edible glue (mix suagr and water to make this)
Pink food colouring
 
First roll out your marzipan to about 1/4 inch thick and using a circle cutter the same size as your cupcakes cut out circles and place them onto your cupcake and smooth out
 
Do the same with your ready to roll icing and stick it on top of the marzipan with your sugar and water mix and smooth out

Next roll out your blue icing and cut into a half moon shape

Stick it onto the top of your cupcake again just use a little sugar and water to stick it down

Roll out a thin strip of blue icing for the hat band stick it on and use a cocktail stick to give it texture, roll a small ball of blue icing use a cocktail stick again on this to give it texure and stick that on the top of the hat

Next use a ball tool or a small round object to press small holes into the icing for eyes, add a little of the water and sugar mixture and place two small balls of black icing for eyes, using the orange icing shape a cone shape for the carrot nose again stick on with the water and sugar

Next take the pink food colouring and dip a tiny bit on his face for rosey cheeks, use the end of a nozzle, straw or just use a knife to make an imprint of his mouth and there we go a lovely little frosty snowman, perfect for the holiday season! Here are some more ideas for your cupcakes if you would like a blog post on how to do any of these please let me know, there will be a lot more tutorials on how to decorate christmas cupcakes so please stay tuned for that! 


Stay tuned for may more feative posts and please follow and let me know if you have any requests, thank you!
Xxx